A thorough knowledge of knot tying is critical to fishing success—here’s all you need to know.
The best anglers in the world make a habit of doing things right. They keep their gear in perfect working order with routine maintenance, replacing anything that appears even the least bit suspect. This attention to detail helps them catch fish consistently, and good knot tying is a key part of that equation.
Fishing line is what connects us to a fish, a secure knot will ensure we stay connected. If you tie a poor knot, you’ll pay the price in lost fish and shattered piscatorial dreams. After all, your knot will always be the weakest link in the equation, so you might as well tie it right. Just as important as tying a good knot is selecting the right knot for the tackle and technique you’re using. Here are some tips to get it right every time.
GENERAL LINE MANAGEMENT
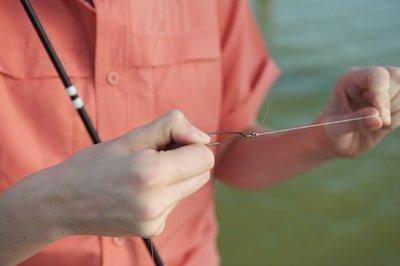
To tie a great knot, you need a great fishing line. If you are using a lesser quality line you will multiply your knot headaches exponentially. Inferior lines break easily and hold knots poorly.
When picking the right line-and-knot pairing, matching the line poundage rating to the application is key. Anglers choosing light lines, for instance, for power fishing techniques (e.g., big swimbaits) can expect plenty of knot issues as the equipment overtaxes the line. A heavy action rod matched with a reel spooled with light line is a prescription for failure. The heavy action rod has very little give, and will easily break light line, usually at the knot.
No matter the line brand, store unused line in a dark, cool place—out of direct sunlight. UV light (i.e., electromagnetic radiation) can degrade lines (especially monofilament) and cause them to fail prematurely. Additionally, leave unused spools in their original package to help guard against nicks or inadvertent damage while being stored.
When on the water, it’s a good idea to re-tie often, especially after catching a good fish, snagging your bait or lure, or after fishing for an hour or more around lots of obstructions. When you re-tie, be sure to check the 6 or 7 feet of line nearest the bait. That’s the part that receives the most wear. Gently run the line between your thumb and forefinger to check for nicks and abrasions. If you find damage, cut the line off above that area before re-attaching your bait. Light lines and supple monofilaments are most susceptible to wear and tear, so pay close attention to those.
10 BEST KNOT TYING PRACTICES
Anglers are often their own worst enemies when it comes to tying knots. Bad knots break, often, and at the worst times. The old adage “practice makes perfect” definitely applies to knot tying. Before using any knot on the water, practice tying it at home. Learn to tie them quickly, smoothly, and intuitively. It will save you time, and fish, on the water. Modern knots can be intricate, and learning them on the water is a sure path to frustration and lost fish. Beyond watching your hard-earned trophy swim away, you could also lose some expensive lures.
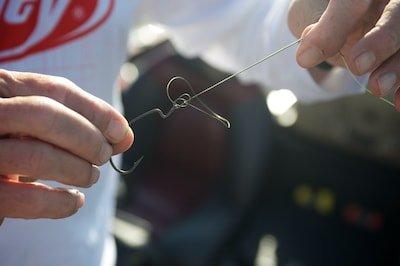
Here are ten knot tying habits you should adopt:
- Pick the right knot for the application. Some knots work best with monofilament or fluorocarbon, while others are better suited to braided lines. Know which knots work best with each type of line (see the Five Top Knots You Should Know section below) and use them accordingly.
- Only use knots with a minimum knot strength of 90%. All knots lessen the overall strength of the main fishing line. A chain is only as strong as its weakest link, and your fishing line is only as strong as your knot. When selecting a knot, make sure it carries at least 90% of the line strength for your specific line type. Most knot strengths are listed online with a simple Google search for the specific knot and line combo.
- Choose a knot that works for you and stick with it. When you find a knot that works well—and you can tie it with confidence—stick with it. There’s little need to experiment with new knots when your favorite is working perfectly. The adage “don’t fix what ain’t broken,” applies nicely to knot tying.
- Lubricate knots. This is one of the simplest and easiest ways to ensure a good knot. Cinching down a dry knot abrades the line and causes excess heat. Both will damage your line. You can lubricate your knot with water or saliva. Cinching it down when wet will greatly improve your knot strength.
- Tighten the tag end. Every knot has a “tag end”—the loose end that opposes the mainline (the line coming off the reel). Before clipping it off, give it a tug to ensure that it won’t slip through the knot, causing the knot to come undone.
- Don’t trim tag ends too close to the knot itself. Long tag ends on knots are maddening. Make it a practice to trim these close to the knot, but be careful you’re not cutting it too close. That could nick the knot and damage it right from the start.
- Inspect your knots. Just because you’ve wet your knot, cinched it down, and cut the tag end off doesn’t mean you’re done. After tying your knot, inspect it closely for any imperfections, especially if the knot is new to you or you’re tying it under difficult conditions. You’ll be amazed at how often you’ll identify an imperfect knot that needs retying.
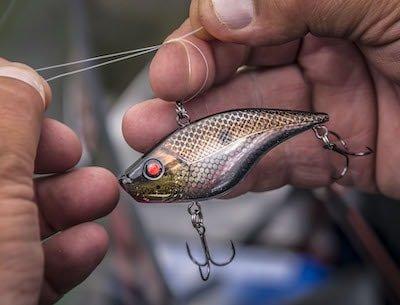
- Retie. Often! Fishermen are prone to getting into a hurry. They catch a fish and quickly return it to the water and get right back out there with their next cast. After all, what angler wants to miss an opportunity to catch another fish? But if you want your knots to last, you need to retie often. At a minimum, check your knot(s) after every fish. And, for that matter, after every snag. And did we mention to retie often?
- Follow knot tying guidelines. Anglers often take short cuts. If a knot is supposed to be wrapped seven times, wrap it seven times. Wrapping it five times isn’t saving you any time, and you’re certainly tying a weaker knot.
- Give it a firm tug. This may sound obvious, but giving your freshly tied knot a good tug to check your workmanship is a must. Leaving knots unchecked can lead to disaster. Nothing is more disheartening than watching a lure sail off into the horizon when a knot breaks or simply comes untied.
FIVE KNOTS YOU SHOULD KNOW
Now you know the best practices for knot tying. Here are five crucial knots you should learn to improve your skills and catch more fish.
(1) Trilene Knot.
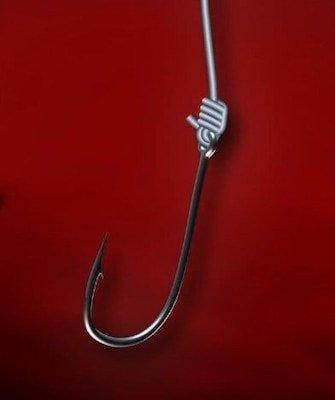
The Trilene Knot was developed by Berkley specifically for use with its monofilament lines. It excels for joining swivels, leaders, and lures to monofilament and fluorocarbon.
Tying the Trilene Knot:
- Run the tag end of the line through the hook eye twice, forming a small loop.
- Pinch the loop between thumb and forefinger to hold it in place, then wrap the tag end of the line around the standing line at least five times and pass the end back through the loops.
- Moisten thoroughly and draw tight.
(2) Palomar Knot.
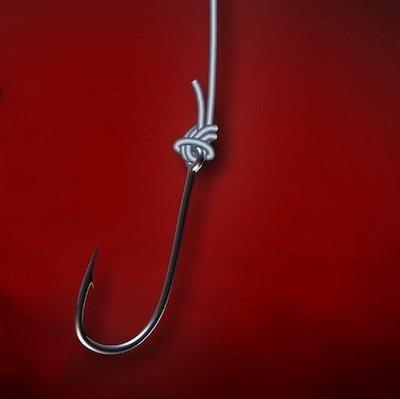
The Palomar Knot excels when joining braids to leaders or lures. It also works well with fluorocarbon fishing line. Strong and easy to tie, the Palomar resists slipping.
Tying the Palomar Knot:
- Double about six inches of the main line and run it through the hook eye.
- Double the loop back and make an overhand knot around the doubled line, leaving a loop large enough to pass the hook or lure through.
- Pull the loop down and around the entire hook or lure.
- Moisten well and draw tight by pulling both ends of the line.
(3) Improved Clinch Knot.
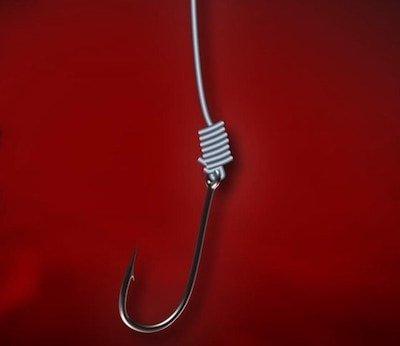
The Improved Clinch knot is extremely popular. It is one of the best knots for lashing fishing line to a hook, lure, or swivel. The “improved” version includes an extra tuck under the final turn. However, the Improved Clinch isn’t for heavier lines over 30-pound test.
Tying the Improved Clinch Knot:
- Thread the mainline through the eye of the hook.
- Double back making 5 or more turns around the standing line.
- Bring the end of line back through the first loop formed behind the eye, then through the big loop.
- Wet your knot and pull on the tag end to tighten down the coils.
(4) FG Knot.
The FG Knot is another great knot for tying braided lines to fluorocarbon leader materials. The FG Knot The FG Knot, while admittedly a bit complicated, offers arguably the best leader to mainline link available.
Tying the FG Knot:
- Apply constant tension to the braided mainline.
- Thread the fluorocarbon leader material onto the braided mainline.
- Use hitch knots to lock the braided line coils together.
- Pull hard on the braided mainline.
- Cut off the tag end of the fluorocarbon leader material.
- Tie two more hitch knots above the fluorocarbon leader material.
- Cut-off the tag end of the braided mainline. Make certain the knot is tight.
(5) Uni to Uni Knot.
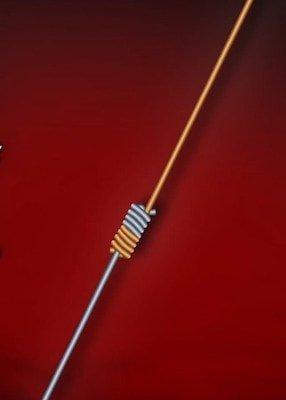
This knot is a standout when joining lines of relatively similar diameter. It excels when adding a monofilament or fluorocarbon leader to your braid mainline.
Tying the Uni to Uni Knot:
- Overlap the end of the leader material and main line about 6 inches.
- Bring the tag end of the main line toward the middle, forming a loop.
- Using the same tag end, make 6 to 8 turns through the loop and tighten by pulling on the tag end.
- Repeat steps 2 and 3 with the leader material.
- After moistening, pull the standing lines in opposite directions to bring the knots together.
Giving meticulous care to one’s knots is the difference between a casual fisherman and a serious angler. Use the above tips and master these five knots to elevate your fishing and keep your line functioning at its best.